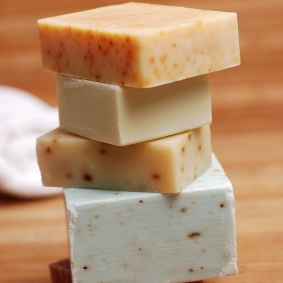
Cold process soap allows you to control every ingredient that goes into your soap. If your looking for an all natural soap or have allergies this is perfect for you! This post contains a fairly basic recipe to help get you comfortable before you start formulating your own recipes. The disadvantage to CP soap is that it takes 4-6 weeks to cure before use.
24 oz. Recipe:
6 oz. Olive Oil
6 oz. Coconut Oil
9.5 oz. Palm Oil
8 oz. Distilled Water
3 oz. Sodium Hydroxide (Food grade lye)
1 oz. Fragrance Oil
Step 1 – Prepare your ingredients and mix your lye water
Measure all ingredients by weight on a scale in separate measuring cups. Use your safety glasses and gloves when working with lye.
In a well ventilated area (outside if possible), carefully pour your lye into your cold water slowly and stir until lye crystals have dissolved. The water will heat up to about 200 degrees, get cloudy and produce fumes that may make you cough if you are not in a well ventilated area. Allow lye water to cool and return to a semi clear color.
Step 2- Prepare your oils
Combine your oils and heat your in the microwave or in a stainless steel or enamel pot over low heat until melted. Remove from heat and allow to cool. Add your fragrance oil and stir well.
Step 3
Both the water/lye solution and oils must cool to temperatures between 95 and 110 degrees. If either is too cool you must heat them up again and if they are too hot, be patient and wait for them to cool. When both the oils and the lye solution are between 95 and 110 degrees you are ready for the next step.
Step 4
Here’s the fun part and hopefully you still have your rubber gloves on too. Slowly pour a steady stream of lye solution into the oils mixture, stirring constantly in a slow circular motion until all of the lye has been added. Be careful not to spatter lye onto yourself or anything else.) Continue stirring until lye is fully mixed with the oils.
Step 5
Break out your hand mixer and blend then stir in 10 second intervals until soap “traces”. Trace is when you can lift your stick blender out of the creamy soap mixture and the drips leaves a “trace” of where the blender was. To get to trace it may only take a few minutes or it may take as long as ½ hour depending on the kind of fragrance or essential oils used because some will trace quicker than others. Stir in color or herbs if desired.
Step 6
Pour the fragrant soap mixture into your mold or lined box. Put a lid on and set the box in an undisturbed place that’s free from drafts. Cover well with a folded blanket and allow to sit for 12 hours. Do not disturb! It is important that the soap mixture be left alone and covered until saponification is complete.
Step 7
Remove the blanket and lid. You should now have a beautiful block of soap! Allow it to sit for 12 more hours before removing it from the box.
Step 8
After the block of soap is out of the box it will be firm but pliable. At this point you can work it and shape it like clay or simply cut it into bars. Final firmness requires 4 to 6 weeks of exposure to air, then the soap will be ready to use.